こんにちは、三村です。
今日は30DaysOfStreamlit の9日目Line chartの出力を、SnowflakeのNativeAppとして自分自身のアカウントにデプロイする方法を記載いたします。StreamlitをSnowflakeで走らせちゃいましょう♪
1.ローカル環境にAppに必要なファイルを準備
ローカル環境に必要なファイルを準備します。
今回必要なファイルは3つ、①manifest.yml ②setup.sql ③streamlit.py です。
それぞれのファイル内容を記載いたします。
①manifest.yml
#version identifier
manifest_version: 1

version:
  name: V1
  label: Version One
  comment: The first version of the application

#artifacts that are distributed from this version of the package
artifacts:
  setup_script: scripts/setup.sql
  default_streamlit: app_instance_schema.streamlit
  extension_code: true

#runtime configuration for this version
configuration:
  log_level: debug
  trace_level: off②
②setup.sql
-- ==========================================
-- This script runs when the app is installed
-- ==========================================

-- Create Application Role and Schema
create application role if not exists app_instance_role;
create or alter versioned schema app_instance_schema;

-- Create Streamlit app
create or replace streamlit app_instance_schema.streamlit from '/libraries' main_file='streamlit.py';

-- Grant usage and permissions on objects
grant usage on schema app_instance_schema to application role app_instance_role;
grant usage on streamlit app_instance_schema.streamlit to application role app_instance_role;
③streamlit.py
import streamlit as st
import pandas as pd
import numpy as np

def load_app():
    st.header('Line chart')

    chart_data = pd.DataFrame(
        np.random.randn(20, 3),
        columns=['a', 'b', 'c'])

    st.line_chart(chart_data)

st.title("Line chart test!")
load_app()
ファイルをローカル環境に以下のように配置します。(親ディレクトリを例としてV1とします)
V1¥manifest.yml
V1¥scripts¥setup.sql
V1¥libraries¥streamlit.py
2.アプリケーション パッケージおよびステージ作成
操作はすべてaccountadminの権限で行います。
アプリケーション パッケージを作成します。
Native Apps Framework に必要なファイルを保存するための名前付きステージを作成します。
※アプリケーション パッケージの外部のデータベースおよびスキーマに存在する名前付きステージを使用することもできます。
CREATE SCHEMA test_schema;
CREATE OR REPLACE STAGE streamlit9.test_schema.test_stage DIRECTORY = ( ENABLE = true ) COMMENT = ”;
3.ファイルをステージにアップロード
ローカルに作成した3つのファイルをステージにアップロードします
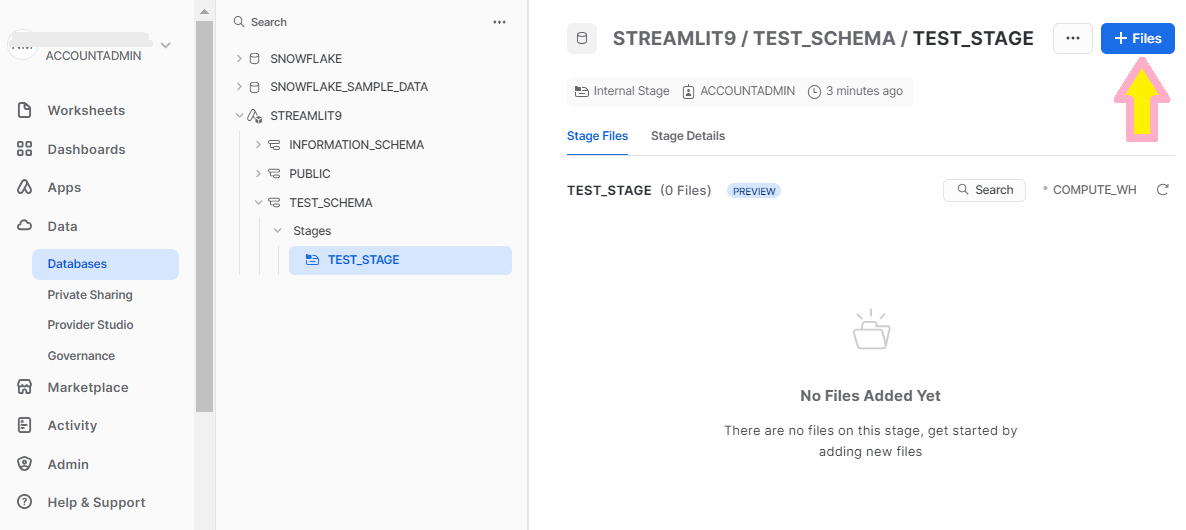
Data → Database → STREAMLIT9 → TEST_SCHEMA → Stages → TEST_STAGE
画面右上の +Fileボタンを押下します。
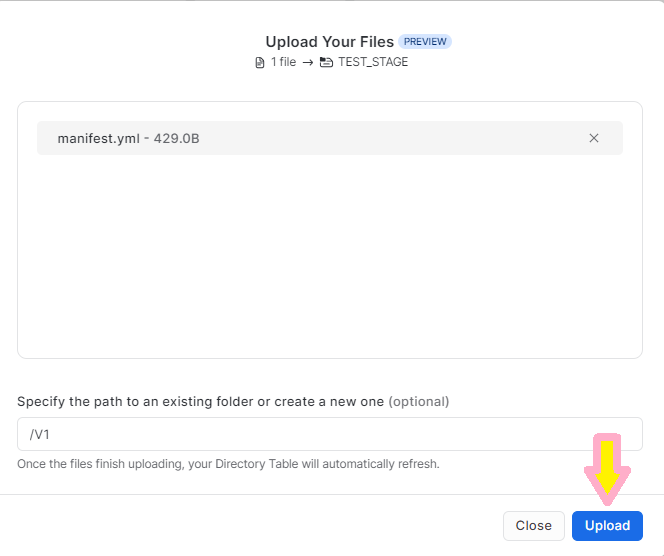
ディレクトリ名を入力し(今回はV1)、Browseボタンを押下します。
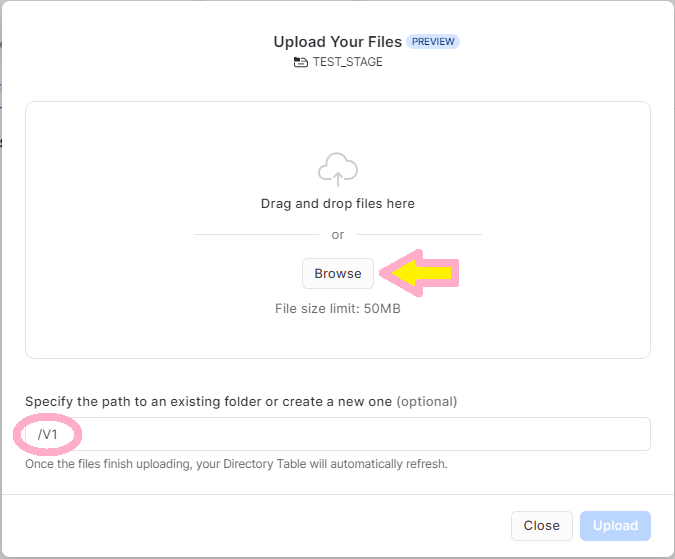
ダイアログでmanifest.yml を指定します。
そして画面右下のUploadボタンを押下します。これで V1¥manifest.yml がアップロードされます。
次にV1¥scripts¥setup.sql をアップロードします。V1を押下します。
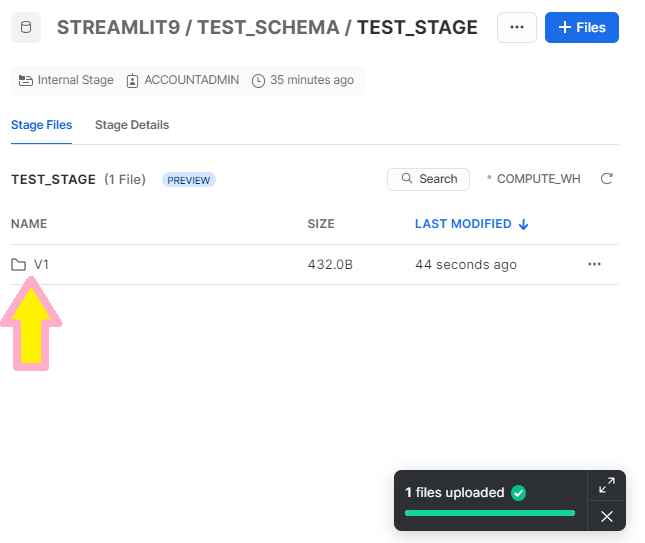
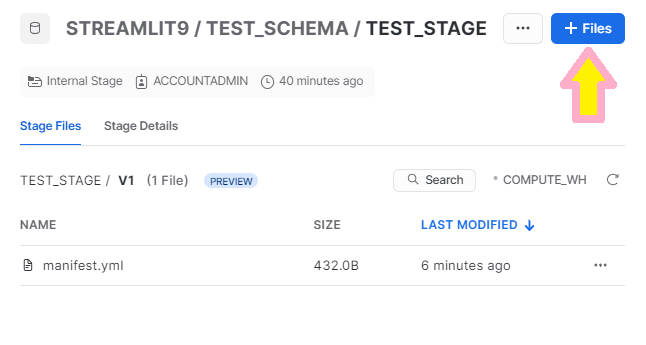
先程アップロードしたV1¥manifest.yml が見えています。
画面右上の +Fileボタンを押下します。
ディレクトリに/V1/scripts を入力し、Browseボタンを押下します。
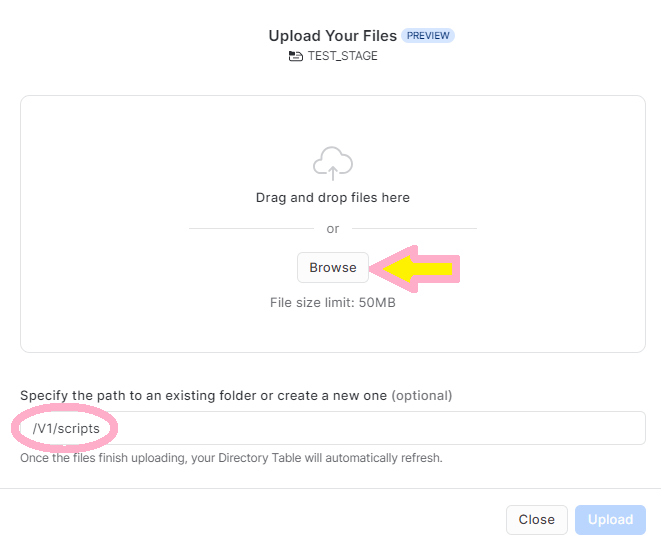
manifest.ymlをアップロードしたのと同じ手順で、setup.sql をアップロードします。
V1¥libraries¥streamlit.py も同じ手順でアップロードします。
4.ヴァージョンを作成し、App作成
ヴァージョンを作成します。
ALTER APPLICATION PACKAGE streamlit9 SET DEFAULT RELEASE DIRECTIVE VERSION = “V1” PATCH = 0;
自分自身のアカウントへAppを作成します。
USE SCHEMA test_schema;CREATE APPLICATION my_streamlit9 FROM application package streamlit9 using version V1 patch 0;
Appが作成されたか確認します。
※他のアカウントへ共有する場合は、ヴァージョン作成後、以下の自動セキュリティスキャンを行い、リストを作ってPublishします。
SHOW VERSIONS IN APPLICATION PACKAGE streamlit9;
5.Appを走らせる
5.1 anacondaの許可
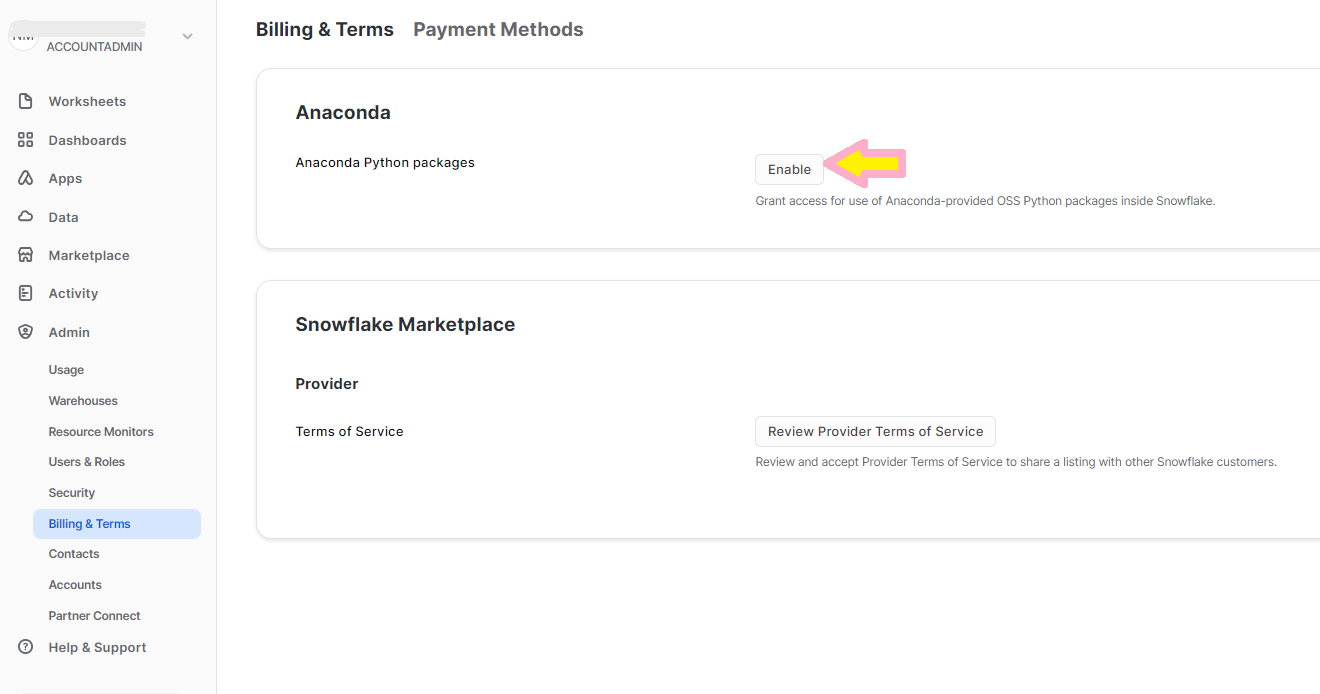
Admin → Billing & Terms でAnacondaを許可します。
5.2 アプリケーションの実行
Apps で作成した MY_STREAMLIT9を押下します。

オーブンに入って・・・表示されましたでしょうか?

注意!!
今現在の仕様では Snowflake上でStreamlitを走らせると 画面を表示している間、ウェアハウスが動いてしまいます。
確認したら早めに閉じましょう。


